How to Record Bird Sounds With Your Smartphone: Our Tips
August 8, 2016

If you want to make great sound recordings, you need specialized equipment. But if you just need to make decent sound recordings, a smartphone works remarkably well—if you know what you’re doing.
Recording the sounds of nature is fun, opens up a new avenue for studying the birds around you, and helps scientists when you upload your recordings as part of your eBird checklists. Though smartphones aren’t the ideal equipment, they are powerful, easy to carry, and nearly always within reach. Here are some quick tips on how to get the most out of a phone, from our recording experts at the Macaulay Library (read their full tips here).
Use a Recording App
Your smartphone comes with built-in recording capabilities, such as the Voice Memos app, and is equipped with a camera that can record videos with sound. The video camera and built-in app are less than ideal, however, for recording bird sounds.
A better way to record bird sounds is to download a dedicated recording app. Many apps are free, are easy to use, and require little time investment. All you need to do is configure your settings once and you’re all set. Many of these apps even have seamless sharing to transfer recordings to your computer.
The Macaulay Library recommends choosing an app that lets you record uncompressed WAV files. That’s techno-speak for an audio format that provides the highest quality and most accurate copy of wildlife sounds. It’s also the format used by archives dedicated to long-term audio preservation.
You’ll get far better recordings with an app that saves WAV files, such as RØDE Rec (iOS) or RecForge II (Android).
Quickly Check These Key Recording Settings
Most dedicated recording apps allow you to configure some standard settings. Here’s what you want to aim for:
- File type–Always select WAV (.wav), an uncompressed file format that gives better results than compressed file formats like MP3s and M4As.
- Recording quality–Set this as high as possible. Some programs give simple options, such as “Low” or “High,” while others let you choose sample rate and bit depth settings. I recommend a sample rate of 48 kHz and a bit depth of 24 bits, but if those options aren’t available, select 44.1 kHz and 16 bits.
- Channels–Most phones record audio only in mono, so this is the best option to choose. With the “stereo” option, the audio records in two identical channels, unnecessarily doubling the size of the sound file.
- Automatic gain control–Often labeled AGC, this should be turned off, so that you can control the record level manually.
- Level setting–Most dedicated recording apps allow you to control the recording level. You should aim to have the peak between –6 and –12 dB; most important, do not let the peak level hit 0 dB.
Don’t Worry About Adding a Small External Microphone
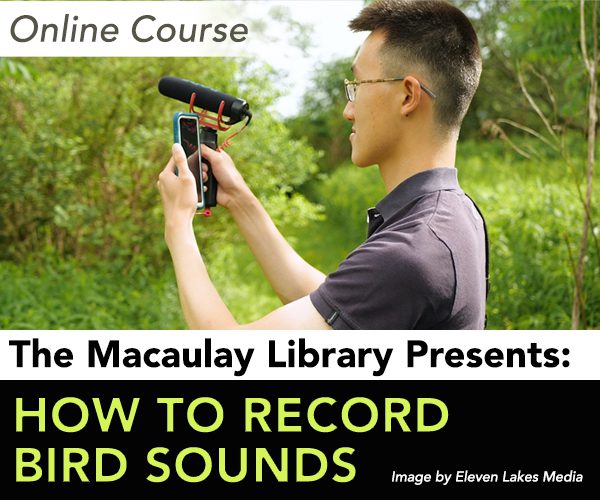
We’ve found that the smaller microphones that attach directly to your phone don’t do much to improve your recording. These types of microphones are not directional, which means that they pick up sound all around you instead of focusing on the sound in front of the microphone. Microphones that are directional, like a shotgun microphone or a parabolic reflector, greatly improve the quality of your recordings even if you are using a smartphone as a recording unit.
Practice Good Recording Technique
A smartphone is designed to capture loud sounds at close range, and you’re trying to pick up soft sounds from a long way away. Any noise you make as you record—whispering, shuffling your feet, even rustling your clothing—will drown out what you’re trying to record. Here’s how to keep the noise down:
- Get as close to the bird as you can without altering its behavior
- Know where the mic is on your phone. Keep your hands and other obstructions away and keep it pointed at your target
- Rest the phone against a stable surface to help with fatigue
- Don’t move or talk—even minor movements like shifting your weight or brushing away mosquitoes will create noise
- Minimize background noise: point your phone away from that highway, ventilation duct, babbling brook, or other source of background noise
- Make long recordings. You never know when a bird is going to do something different and interesting
- Make a voice announcement at the end stating what you recorded, the date, time, and weather conditions—before you forget
Keep Free Space on Your Phone
Now that we’ve persuaded you to record in WAV, remember to keep free space on your phone. WAV files are much larger than mp3 files (because they preserve all that original sonic information). Fortunately, many phones now have oodles of memory, and you don’t want to start a stellar recording only to be informed that your phone is full.
Back Up to a Computer
Your recordings aren’t truly safe until they’re off your phone—plus, you can reclaim and reuse that memory as soon as you back up your clips.
Make Minor Edits and Upload to eBird/Macaulay Library!
Our experts like to stress that it’s unnecessary—and even counterproductive—to “pretty up” your recordings with edits and filters. It’s helpful to trim the ends of your recording and cut out any handling noise. You can also raise the volume if the recorded sound is quiet. But don’t try to enhance the recording in other ways, such as removing nontarget sounds (such as insect noise) or cutting out silences (which tell us something about the bird’s behavior). When you’re finished, enter an eBird checklist and upload your sound files—we’ll accept files as large as 250 MB, so have a ball!
Here’s more complete advice on best practices for recording and uploading audio.
Have Fun
You’re all set! Recording birds is a great way to deepen your understanding of birds. With these tips, plus your trusty smartphone, you’re well equipped to take the next step into the aural delights of the natural world.


All About Birds is a free resource
Available for everyone,
funded by donors like you


